使用 Google 进行身份验证#
警告
此文档近期未更新,且自上次更新以来,OAuthenticator 已发布主要版本。因此,请仅将此文档作为官方 OAuthenticator 文档的补充。
未来,目标是确保我们在 OAuthenticator 项目中拥有良好的文档,并引用该文档,而不是在此项目中也维护类似的文档。
通过 Google OAuthenticator,用户可以使用他们的 Google 用户 ID/密码登录您的 JupyterHub。为此,您首先需要向 Google 注册一个应用程序,然后将此应用程序的信息提供给您的 tljh 配置。请参阅 Google 的文档,了解如何创建 OAuth 2.0 客户端凭据。
注意
您需要一个 Google 帐户才能完成这些步骤。
步骤 1:创建 Google 项目#
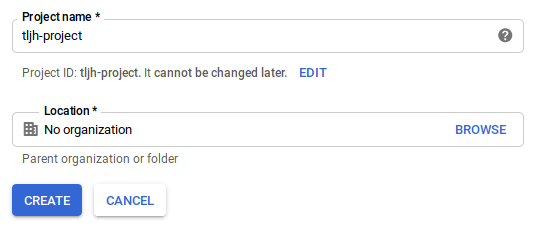
访问 Google Developers Console 并创建一个新项目。
步骤 2:设置 Google OAuth 客户端 ID 和密钥#
创建并选择项目后
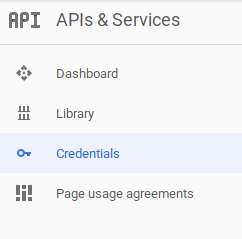
前往凭据菜单
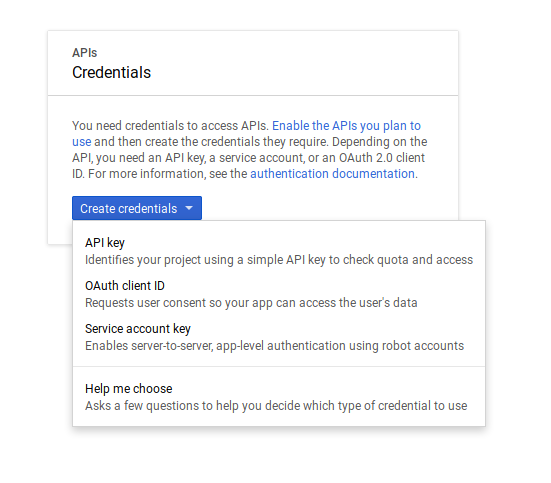
点击“创建凭据”,并从下拉菜单中选择 “OAuth 客户端 ID”
您需要填写以下表格:
应用程序类型:选择 Web 应用程序
名称:您的 OAuth 客户端 ID 的描述性名称(例如
tljh-client)授权的 JavaScript 源:使用您的 JupyterHub 的 IP 地址或 URL。例如
http(s)://<my-tljh-url>。授权的重定向 URI:插入以下格式的文本
http(s)://<my-tljh-ip-address>/hub/oauth_callback
完成页面填写后,它应该看起来像这样(理想情况下没有红色警告)
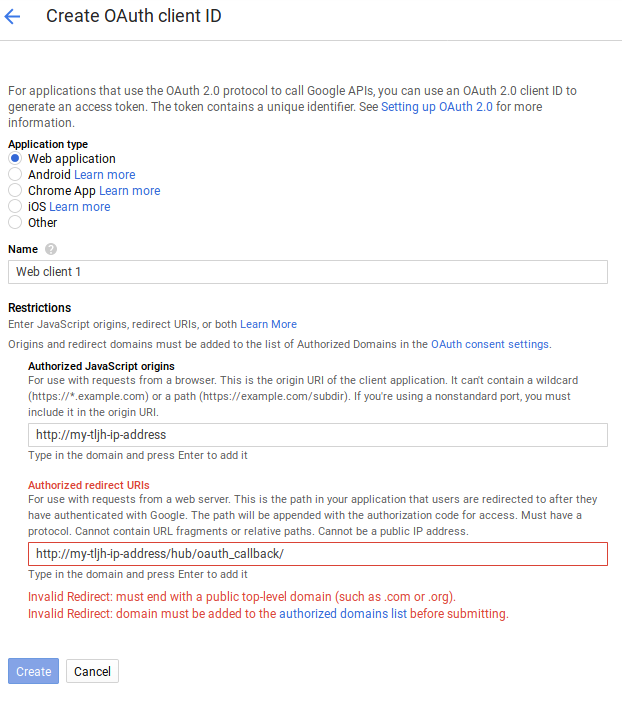
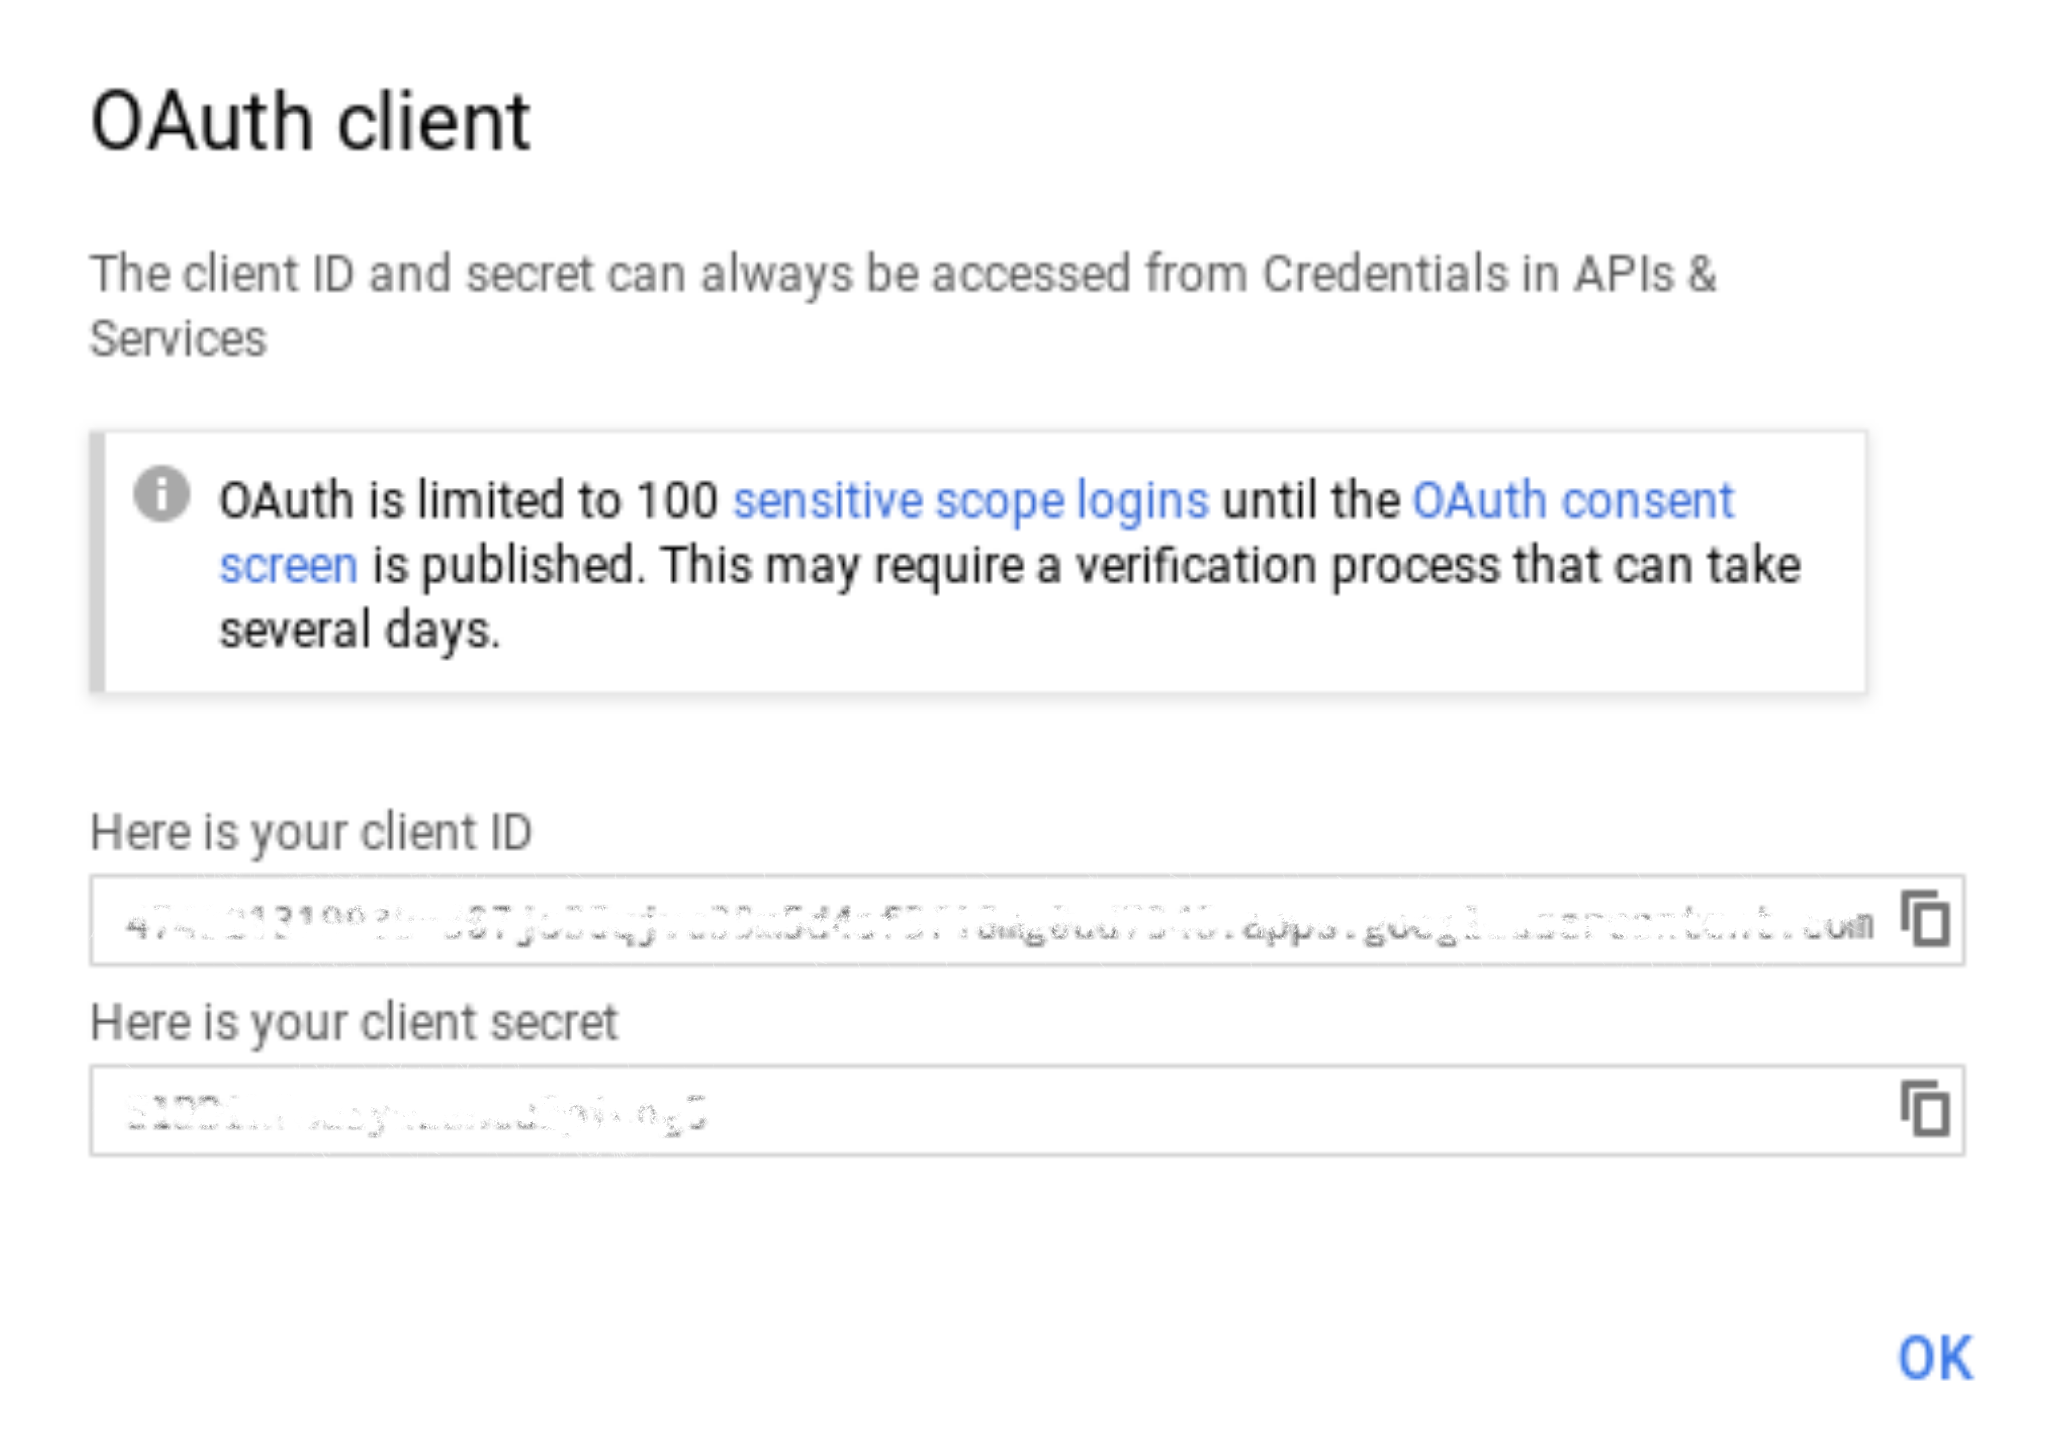
点击“创建”。您将被带到一个显示已注册应用程序详细信息的页面。
从应用程序详细信息页面复制 客户端 ID 和 客户端密钥。您稍后将使用它们来配置您的 JupyterHub 身份验证器。
重要提示
如果您使用的是云提供商的虚拟机并 停止了虚拟机,那么当您重新启动虚拟机时,提供商可能会为其分配一个 新的公共 IP 地址。在这种情况下,您必须使用新的 IP 地址更新您的 Google 应用程序信息。
步骤 3:配置您的 JupyterHub 以使用 Google OAuthenticator#
使用 tljh-config 进行配置#
在本节中,我们将使用 tljh-config 工具来配置您的 JupyterHub 的身份验证。有关 tljh-config 的更多信息,请参阅 使用 tljh-config 配置 TLJH。
重要提示
默认情况下,以下设置允许任何拥有 Google 帐户的人登录。您可以使用 用户列表 设置特定的允许用户和管理员。
以管理员帐户身份登录到您的 JupyterHub。
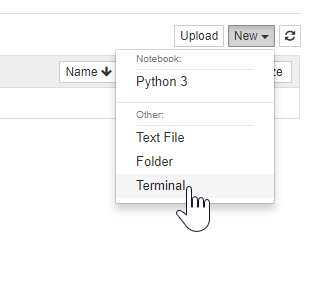
打开一个终端窗口。
使用以下命令配置 Google OAuthenticator 以使用您的客户端 ID、客户端密钥和回调 URL
sudo tljh-config set auth.GoogleOAuthenticator.client_id '<my-tljh-client-id>'
sudo tljh-config set auth.GoogleOAuthenticator.client_secret '<my-tljh-client-secret>'
sudo tljh-config set auth.GoogleOAuthenticator.oauth_callback_url 'http(s)://<my-tljh-ip-address>/hub/oauth_callback'
告知您的 JupyterHub 使用 Google OAuthenticator 进行身份验证
sudo tljh-config set auth.type oauthenticator.google.GoogleOAuthenticator
重启您的 JupyterHub,以便新用户看到这些更改
sudo tljh-config reload
使用 Google 群组的高级配置#
您的 TLJH 的管理用户和普通用户也可以通过 Google 群组轻松管理。这需要一个服务帐户和一个工作区管理员帐户,该服务帐户可以模拟该管理员帐户以读取您域中的群组。您可能需要联系您的 Google Workspace 管理员以获取执行这些步骤的帮助。
创建服务帐户密钥。将此密钥保存在安全的地方,您稍后需要将其添加到您的实例中。
为服务帐户设置 域范围委派,其中包括以下范围
https://www.googleapis.com/auth/admin.directory.user.readonly
https://www.googleapis.com/auth/admin.directory.group.readonly
将服务帐户密钥添加到您的实例中,并确保非集线器管理员用户无法读取它。
重要提示
服务帐户密钥是秘密。任何您在其 TLJH 实例上配置管理员权限的人都将能够访问它。
以管理员帐户身份登录到您的 JupyterHub。
打开一个终端窗口。
在集线器环境中安装额外要求。
source /opt/tljh/hub/bin/activate
pip3 install oauthenticator[googlegroups]
deactivate
在
/opt/tljh/config/中创建一个配置目录jupyterhub_config.d。此目录中的任何.py文件都将用于配置。sudo mkdir /opt/tljh/config/jupyterhub_config.d
通过将以下内容添加到
/opt/tljh/config/jupyterhub_config.d中的.py文件中,配置您的中心以进行基于 Google 群组的身份验证。from oauthenticator.google import GoogleOAuthenticator c.JupyterHub.authenticator_class = GoogleOAuthenticator c.GoogleOAuthenticator.google_service_account_keys = {'<my-domain.com>': '</path/to/your/service_account_key.json>'} c.GoogleOAuthenticator.gsuite_administrator = {'<my-domain.com>': '<my-gsuite-admin>'} c.GoogleOAuthenticator.allowed_google_groups = {'<my-domain.com>': ['example-group', 'another-example-group']} c.GoogleOAuthenticator.admin_google_groups = {'<my-domain.com>': ['example-admin-group', 'another-example-admin-group']} c.GoogleOAuthenticator.client_id = '<my-tljh-client-id>' c.GoogleOAuthenticator.client_secret = '<my-tljh-client-secret>' c.GoogleOAuthenticator.hosted_domain = '<my-domain.com>' c.GoogleOAuthenticator.login_service = '<my-login-service>' c.GoogleOAuthenticator.oauth_callback_url = 'http(s)://<my-tljh-ip-address>/hub/oauth_callback'
有关这些和其他配置选项的更多信息,请参阅 Google OAuthenticator 文档。
重新加载配置以使更改生效
sudo tljh-config reload
步骤 4:确认新的身份验证器有效#
在浏览器中打开一个无痕窗口(在确认新的身份验证方法有效之前不要注销!)
转到您的 JupyterHub URL。
您应该会看到一个 Google 登录按钮,如下图所示
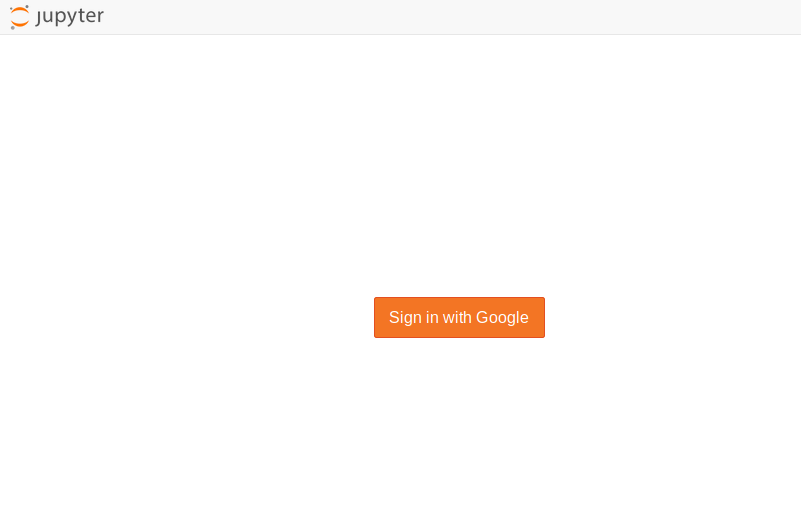
使用 Google 凭据登录后,您应该会被重定向到此 JupyterHub 中使用的 Jupyter 界面。
如果这不起作用,您可以按照 首次登录时让用户选择密码 中的步骤恢复到默认的 JupyterHub 身份验证器。