启用 HTTPS#
每个 JupyterHub 部署都应启用 HTTPS!
HTTPS 加密流量,以便用户名、密码和您的数据安全地传输。敏感信息可以安全地传输。The Littlest JupyterHub 支持通过 Let’s Encrypt 自动配置 HTTPS,或通过您自己的 TLS 密钥和证书 手动 设置。除非您有充分理由使用手动方法,否则您应该使用 Let’s Encrypt 方法。
注意
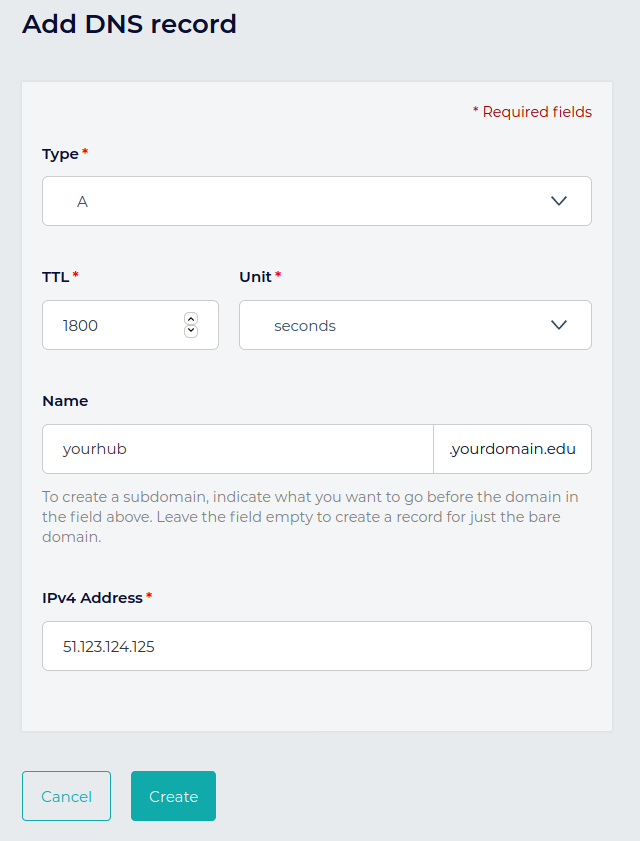
在设置 HTTPS 之前,您必须设置一个指向 TLJH 可访问 IP 地址的域名。
为此,您需要登录您的域名注册商网站,进入 DNS 记录部分。界面可能与此类似:
使用 Let’s Encrypt 自动启用 HTTPS#
注意
如果您运行的机器无法从互联网访问——例如,如果它是您组织内部与互联网隔离的机器——您就不能使用此方法。请 手动 设置 DNS 条目和 HTTPS。
要通过 Let's Encrypt 启用 HTTPS
sudo tljh-config set https.enabled true
sudo tljh-config set https.letsencrypt.email you@example.com
sudo tljh-config add-item https.letsencrypt.domains yourhub.yourdomain.edu
其中 you@example.com 是您的电子邮件地址,yourhub.yourdomain.edu 是您的 Hub 将运行的域名。
加载此配置后,您的配置应如下所示:
sudo tljh-config show
https:
  enabled: true
  letsencrypt:
    email: you@example.com
    domains:
      - yourhub.yourdomain.edu
最后,您可以重新加载代理以加载新配置:
sudo tljh-config reload proxy
此时,代理应与 Let’s Encrypt 协商为您设置受信任的 HTTPS 证书。代理可能需要一些时间与 Let’s Encrypt 协商以获取您的证书,之后您就可以在 https://yourhub.yourdomain.edu 安全地访问您的 Hub。
这些证书有效期为 3 个月。代理将在它们到期之前自动为您续订。
使用现有密钥和证书手动启用 HTTPS#
您可能已经拥有您的域名的 SSL 密钥和证书。如果是这样,您可以告诉您的部署使用这些文件:
sudo tljh-config set https.enabled true
sudo tljh-config set https.tls.key /etc/mycerts/mydomain.key
sudo tljh-config set https.tls.cert /etc/mycerts/mydomain.cert
加载此配置后,您的配置应如下所示:
sudo tljh-config show
https:
  enabled: true
  tls:
    key: /etc/mycerts/mydomain.key
    cert: /etc/mycerts/mydomain.cert
最后,您可以重新加载代理以加载新配置:
sudo tljh-config reload proxy
现在,您可以在与您的证书关联的域名下安全地访问您的 Hub。
故障排除#
如果您在 HTTPS 方面遇到问题,查看 traefik 代理日志 可能会有所帮助。